Create and run separated seed files

Usually We use the great power of rails db:seed in any Rails project. The seeds file provides us a way to quickly manipulate our sample and necessary data, especially at the beginning of our project.

But when times gone, we see that we often add more and more data to our seeds file and we need to rerun the command again. So, we need to comment out the old code in seeds file, or, we need to strictly validate the models. We absolutely don’t want our seed data as a mess

That’s why I start investigating the way to separate our seeds into different files, so we can choose whichever seed file we want to run, to void duplication or commenting old code. But we need a way for other programmer who joins our project later to run all of the files.

Let’s move on.

Continue reading Create and run separated seed files

Create custom Shopify metafield app with Ruby on Rails

Why Shopify and Shopify App

If you’re excited about Ruby on Rails and e-commerce market like me, you might know about Shopify and Spree. However, you might notice that comparing to Spree, Shopify recently has been growing very fast, and there’s always a big demand on this market.

That’s the reason why currently I am working as a Shopify developer for a Singaporean startup in coffee industry. I realize that a lot, a lot of start up companies use Shopify as their platform to build online web stores, at least in this industry area. For almost a half of year, we’ve stayed together to build a cool Shopify market together and continuously added new features to the web app, upgraded the website UI & UX. And, almost the cases, we found a good Shopify App from the Shopify App Store. 

Later, after launching the project, we start thinking about create our own Shopify application that will work best for our store, and that provides us freedom to customize, and we decided to go. In this article I will share some of my experience in creating a public Shopify custom app.

Before we go in detail, you can find the GITHUB SOURCE

Continue reading Create custom Shopify metafield app with Ruby on Rails

Create Ruby on Rails scheduler with Sidekiq and Whenever

When developing web applications, I often encounter a need of implementing some background jobs run regularly. With Ruby on Rails, we have many powerful gems helping us write background job, and sidekiq is a good option. How about scheduling the job to run daily in certain time? You can use crontab on server, set scheduler using curl command to call an API. However, it requires you knowledge about system. Thanks towhenever gem which makes our task much easier in Rails.

Dependencies

Sidekiq is simple, efficient background processing which enqueues your jobs in Redis using multiple threads to run as many jobs as it can in the same time.

Thus, in order to make it work, you will initially need to install Redis on your server. Below is short version how to install Redis on Ubuntu server ( You can ignore this part if you installed Redisbefore )

sudo apt-get update 
sudo apt-get install build-essential tcl 
cd /tmp curl -O http://download.redis.io/redis-stable.tar.gz 
tar xzvf redis-stable.tar.gz 
cd redis-stable 
make 
make test 
sudo make install 
sudo mkdir /etc/redis 
sudo cp /tmp/redis-stable/redis.conf /etc/redis 
sudo nano /etc/redis/redis.conf

Then, to continue, you need to update you config file

# /etc/redis/redis.conf 
# ... 
# change this line 
supervised no 
# to this line 
supervised systemd 
# And change this line 
dir . 
# To 
dir /var/lib/redis

After that, create redis systemd unit file

sudo nano /etc/systemd/system/redis.service

With below content

[Unit]
Description=Redis In-Memory Data Store
After=network.target
[Service]
User=redis
Group=redis
ExecStart=/usr/local/bin/redis-server /etc/redis/redis.conf
ExecStop=/usr/local/bin/redis-cli shutdown
Restart=always
[Install]
WantedBy=multi-user.target

What you need is to run some more commands to make it run

sudo adduser --system --group --no-create-home redis
sudo mkdir /var/lib/redis
sudo chown redis:redis /var/lib/redis
sudo chmod 770 /var/lib/redis
# to start redis
sudo systemctl start redis
# to enable redis at start boot
sudo systemctl enable redis

Continue reading Create Ruby on Rails scheduler with Sidekiq and Whenever

Add parameters to your Rails tasks

I think adding parameters to Rake task is usually necessary. What is rake? It’s a ruby utility that you can use to build up a list of tasks, for your project, in a dynamic way. In order to create a rake task, you can just run

rails g task your_tasks_domain your_first_task your_second_task

Or, you can, create in a manual way, by adding a .rake file in lib/tasks folder

# lib/tasks/your_task_domain.rake
namespace :your_tasks_domain do
  desc "TODO"
  task your_first_task: :environment do
  	# You will write your code here
  	# For example: Task.create(name: "my first task")
  end
  desc "TODO"
  task your_second_task: :environment do
  end
end

Continue reading Add parameters to your Rails tasks

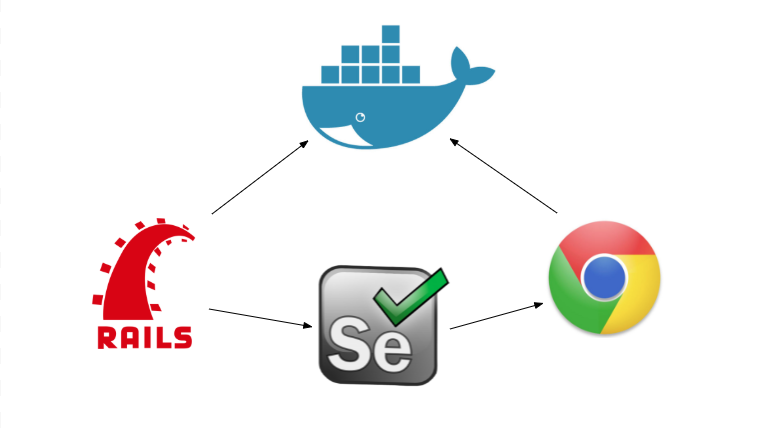
Docker + Capybara + Selenium Chrome Driver

If your Rails app needs extracting data from a website, or if you want to write tests for your features, you might think about a solution like  Capybara.  If you take a look at Capybara github homepage, Capybara can integrate with many drivers, the default one is rack_test, the lightest driver but it does not support executing javascript. There are many other good drivers like capybara-webkit and poltergeist to integrate capybara with phantomjs. I have tried poltergeist but I experienced many problems as listed on the poltergeist github homepage. Thus, I decided to give a try with other popular web driver selenium install with famous  chrome browser.

In this blog I will note some steps to have chrome driver setup together with your Rails inside your Docker as I guess using Docker to setup Rails is quite common now.

    1. Run Docker pull command
      docker pull selenium/standalone-chrome
    2. You need to add extra gem
      gem 'selenium-webdriver'
    3. You need another Docker container which hook to hub. You can do so by adding below code to docker-compose.yml
services:
  web:
    image: selenium/node-chrome:3.12.0-boron    
    depends_on:
      - hub
    environment:
      HUB_HOST: hub

  hub:
    image: selenium/hub:3.12.0-boron
    ports:
      - "4444:4444"
    # .....

Update your docker by

docker-compose build

How about your code? The important thing is that you need to tell Capybara to hook to hub in order to open chrome headless browser when registering driver

require 'selenium-webdriver'
# .....

def instantiate_session
        selenium_url = "http://hub:4444/wd/hub"

        Capybara.register_driver :chrome do |app|
          options = Selenium::WebDriver::Chrome::Options.new(
            args: %w[headless disable-gpu no-sandbox]
          )
          Capybara::Selenium::Driver.new(app, url: selenium_url, browser: :chrome, options: options)
        end

        @session = Capybara::Session.new(:chrome)
        @session.visit(https://google.com)

Have fun!

Avoid unexpected duplication in MySQL database

Screen Shot 2018-05-24 at 4.32.18 PM

Let’s assume that your application has to insert thousand records at the same time, and you might want those records not to be duplicated. For example, you need to perform insertion from a CSV file, to insert contacts, and you want there’s no two contacts with the same email.

You might come up with the solution like: “Ah, ActiveRecord supports validations!”. I think validation like

class User
  validates_uniqueness_of :email
end

I think the validation will work well in majority cases. However, let’s assume you’re doing that task in background job. Then you have another file, which has a lot of duplicated users, and new users, of course. You wanna do the second insertion right after that (or some actions like that at almost same time). Do you think that at the same moment, two jobs will insert the same users, and validations for those two records will both pass. Then? You have the duplicated users in your database.

It’s time to try the second solution. Let’s put the hard jobs on MySQL side. MySQL provides kind of index called UNIQUE index that allows you to enforce the uniqueness of values in one or more columns
You can use MYSQL command

CREATE UNIQUE INDEX idx_email
ON users(email);

You can ask MYSQL to have unique index on multiple columns

CREATE UNIQUE INDEX idx_email_phone
ON users(email, phone);

How can you do with migrations?

add_index :users, [:email, :phone], unique: true

Another thing that We should mention here, MySQL allow multiple rows with NULL even there is UNIQUE INDEX constraint.

Again, you can come up with two possible solutions.

MySQL side

change_column :users, :email, :string, null: false

Or use a validation

validates :email, presence: true

The last thing we should be aware of is that MySQL might raise an exception if there’s duplicated rows. Thus, we should have a rescue block

begin
  # Your code come here
rescue StandardError => e
  # You can write exception detail to a log file using logger
  log = Logger.new("log/mysql.log")
  log.info("#{Time.now.strftime('%Y-%m-%d %H:%M:%S')} - #{e.class}: #{e.message} \n #{email}")
end

That’s all for handling duplicated records
Happy coding!

Deploy Rails 5.2 to Amazon EC2 with Puma, Nginx and Capistrano 3 for multiple environments

It is necessary to know a way to deploy your rails application to your server, it can be production or staging, etc. Capistrano is a good choice that you might want to consider. In this note I will show you how I used Capistrano, Puma & Nginx to deploy my Rails application to Amazon EC2 to deploy your app for production and staging environments.

You can find out more detail about Capistrano, Puma and Nginx

In this blog, there will be only a short guide to help you quickly deploy your application to Amazon Server

Prerequisite

Continue reading Deploy Rails 5.2 to Amazon EC2 with Puma, Nginx and Capistrano 3 for multiple environments

Install Rails with MySql on Windows

Hello Ruby guys!

It had been 4 years before last year I used Ubuntu or MacOS for Ruby on Rails development. It is absolutely that Linux environment is much easier for developers than Windows. The only thing that make me switch from Linux to Windows is that documentation on Windows is much more comfortable.

At first, I tried to use Vmware to install a virtual Ubuntu and program on that operating system. However, problem occurs. I cannot work on virtual machine for long duration, my computer get slower after several hours.

Thus, it’s critical to program Ruby on Rails directly on Windows. After several tries, finally I got a brief note of steps

  1. You should install Ruby and then install rails as gem, instead of using rails installer. You can install latest ruby version on https://rubyinstaller.org/downloads/. You can choose to install along with DevKit. Just follow the ruby installation guide, and remember to choose MSYS development tool when install devkit
  2. Install Git Bash to work with git on command line as on Linux terminal and to have another cool terminal. Many people might prefer using Git tool like SourceTree, SmartGit, etc … It’s your choice.
  3. Open Ruby Command Prompt or Git Bash terminal, test your ruby installation by
     gem install json --platform=ruby --no-ri --no-rdoc
  4. Install XAMPP, the easiest way to have mysql and mysql management tool (phpmyadmin)
  5. Download C connecter , extract to
    C:\

    and copy

    libmysql.dll

    from

    C:\mysql-connector-c-noinstall-6.0.2-win32\lib

    to your ruby installation directory

    C:\Programs\Ruby25\bin
  6. Install rails gem
    gem install rails --platform=ruby --no-ri --no-rdoc
  7. Install mysql2 gem to be able to use mysql as database for your rails project
    gem install mysql2 --platform=ruby --no-ri --no-rdoc
  8. Create new rails project with mysql as database
    rails new ProjectName -d mysql

Happy Coding!


DRY your Rails Model

When you’re trying to make some controllers of your app tinier with agreement to have fatter models, you might think about scope or writing functions for that Model class. In this post, I wanna write some examples of that Active Record technique

Problem definition

The problem my rails app is about is:

    • We have models: User, Post and Tag
    • User and Post have 1-n relationship while Post and Tag have the n-n relationship
    • We gonna find Post with many constraints relating to User and Tag
    • For Post, we have state:string

Before DRY

In the Post model, we have state as and is in ['draft', 'published'] . It’s is normal to query posts by state like

published_posts = Post.where(state: 'published')
draft_posts = Post.where(state: 'draft')

How if you wanna check if a post published or not

post = Post.where(id: 1).first
is_published = post.state == 'published'

And now I wanna get posts of some authors

posts = Post.joins(:authors).where(author_id: params[:author_ids])

or posts with some tag names

posts = Post.joins(:tags).where(tags: {name: params[:tag][:names]})

With some improvements

All are good now, right? hm, it could be even better if we can give some logic to our model

Like this

class Post < ActiveRecord::Base
  STATES = ['published', 'draft']
  belongs_to :author, :class_name => 'User', :foreign_key => 'author_id'
  has_many :tags, through: :post_tags

  scope :published, where(state: 'published')
  scope :tag, lambda{|tags| joins(:tags).where(tags: {name: tags})}

  STATES.each do |state_name|
    define_method "#{state_name}?" do
      self.state == state_name
    end
  end
end

Then, we can have

posts = Post.tag(params[:tags]).published
post = Post .find(params[:id])
post.published?

Happy Coding!

Global method in Rails

If you are familiar with Devise, you might know very well what is current_user. Imagine now you have a several controllers which relate to another object model, example: Project instead of User, and you want to define current_project for your actions in different controllers? I think of a solution, that is to store current_project in cookies, we can get or set this value.

  • First, we should create a projects_controller:
class ProjectsController < ApplicationController
  def current_project
    return cookies[:current_project] ? cookies[:current_project] : Project.first 
  end

  # Set this method as helper method to be able to use in views
  helper_method :current_project
end
  • Then, in other controllers you can inherit that ProjectsController:
class Manager::ProjectsController < ProjectsController
end

class Developer::ProjectsController < ProjectsController
end
  • Or views:
<%= current_project %>
  • You can create an action to change it if necessary
def change_current_project
  cookies.permanent[:current_project] = params[:current_project]
  redirect_to request.referer || root_url
end

Have fun programming!